If you have tried building custom mechanical keyboards, you may have noticed the rattling sound of the keys, especially the spacebar or shift keys.
They may even wobble a bit or make rattling sounds, which can be frustrating for users. Keyboard stabilizers solve these issues and provide a stable and comfortable typing experience.
In this post, we will discuss what keyboard stabilizers are, their types, sizes, and mounting styles.
We will cover everything you need to know about them, including their importance and how they work.
Let’s get started!
What is a Stabilizer for a Mechanical Keyboard?
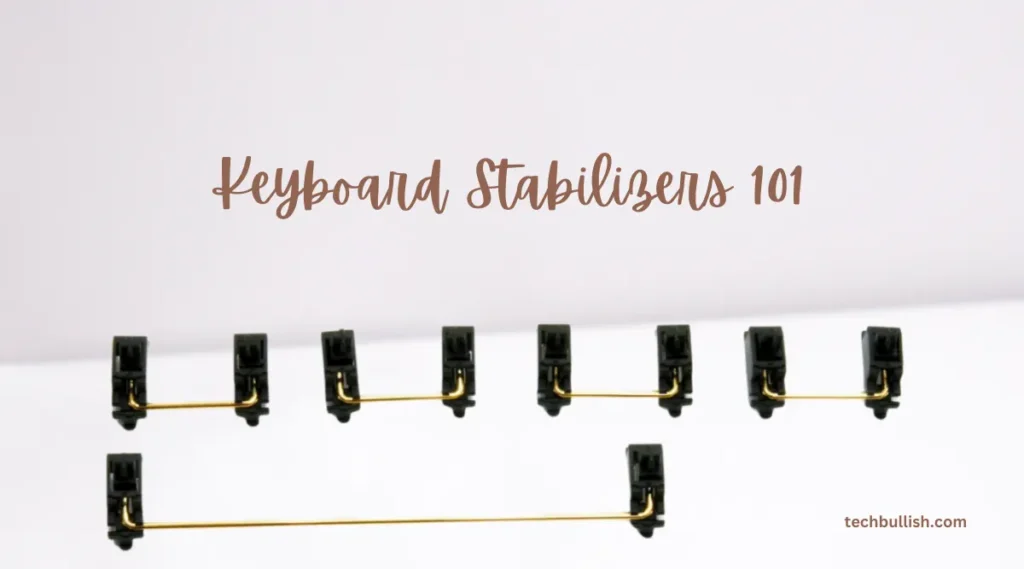
Keyboard stabilizers are a crucial component of mechanical keyboards that help provide a smooth and consistent typing experience. These are designed to keep larger keys such as the spacebar, shift, and enter keys balanced and stable, preventing them from shaking or rattling when pressed.
The stabilizers are placed under the wider keys and work by controlling the vibrations and rattling of the larger keys, providing a stable and consistent movement.
By doing so, they ensure that the typing and gaming experience is comfortable and enjoyable.
There are around 8 stabilizers used in a full-sized keyboard and 5 such in TKL keyboards.
Types of Stabilizers
Cherry Style Stabilizers
Cherry style stabilizers are a popular choice for most keyboards due to their flexible features. They offer easy modding, multiple color options, and various mounting styles, making them easily available.
These stabilizers have an identical shape as a Cherry MX switch stem, which makes them popular. They have a plastic stem on top, and the stabilizers are interconnected via metallic bars. Cherry-style stabilizers are easy to mod and are best for custom-built keyboards. They also come with mounting options.
Pros
- Easy to mod
- Multiple color options
- Various mounting styles
- Identical in shape as Cherry MX switch stem
- Best for custom-built keyboards
Cons
- Can rattle or wiggle if not installed correctly
- More expensive compared to Costar stabilizers
Costar Stabilizers
Costar stabilizers are still fashionable in traditional keyboards. However, they are less popular than Cherry-style stabilizers. Costar stabilizer fitting is time-consuming as the keycaps need to be hooked.
It might be an irritation for those who remove keycaps regularly for any purpose like cleaning or replacing them. Although these provide better-stabilizing performance, they are compatible with users who don’t customize their keyboards more often.
Pros
- Better stabilizing performance
- Compatible with users who don’t customize their keyboards often
- Still fashionable in traditional keyboards
Cons
- Time-consuming to fit as keycaps need to be hooked
- Can be an irritation for those who remove keycaps regularly
Optical Stabilizers
Optical stabilizers are not as popular as Cherry-style stabilizers. They fit mainly in optical mechanical switches, although their compatibility is not always fixed. These stabilizers are fixed with the keyboard with clips on them.
These cannot be modified much and are plated under the keyboard. To reduce noise and have smoothness, you can apply a little amount of lubricant on them.
Pros
- Compatible with optical mechanical switches
- Plated under the keyboard
Cons
- Not as popular as Cherry-style stabilizers
- Compatibility is not always fixed
- Cannot be modified much
Stabilizer Sizes
To suit your keyboard preferences, you can make choices on different sizes of stabilizers.
There are three different sizes of stabilizers, 7u, 6.25u, and 2u.
If your keyboard has a wider space bar you should pick 7u for the best results, although 6.25u can serve your purpose. A full-sized layout needs more stabilizers than smaller ones like TKL.
Since these are found underneath every single large key on the keyboard nearly 8 stabilizers are needed along with one should be 6.25u and the rest seven of 2u size.
Smaller layouts need 2u-sized stabilizers and 6.25u/7u is for spacebar keys always.
Mounting Styles of Cherry Stabilizers
Keyboard stabilizers are an essential component of mechanical keyboards that provide a smooth and consistent typing experience.
There are three types of mounting styles for stabilizers:
- Plate-Mounted,
- Screw-in, and
- Snap-in.
Plate-Mounted Stabilizers
Plate-mounted stabilizers are connected by clipping into metal plates and are commonly found on all pre-built mechanical keyboards.
While this mounting style is not so reliable and efficient, modders can innovate to improve its aspects.
Screw-In Stabilizers
Screw-in stabilizers are screwed indirectly into the PCB with direct mounting on the PCB. They eradicate rattling and vibrations on your keyboard and are found in all custom-made keyboards.
This mounting style is stable and comfortable, making it a popular choice among DIY creators.
Snap-In Stabilizers
Snap-in stabilizers are snapped into the PCB instead of being screwed and are placed into the PCB as well. They are similar to screw-in stabilizers in terms of features but are not as smooth and stable.
However, they serve better than plate-mounted stabilizers when it comes to vibrating factors. It is essential to be careful with them as they might pop out while pulling your keycaps, unlike screw-in ones.
Pros and Cons of Keyboard Stabilizers
Here are some pros and cons of using keyboard stabilizers:
Pros:
- Provide a more comfortable and stable typing experience
- Reduce key wobbling and noise
- Extend key lifespan by reducing stress on the switch
- Improve typing accuracy, especially on longer keys like the spacebar
- Reduce hand movement while typing
- Help with finger fatigue, carpal tunnel syndrome, and other repetitive strain injuries
Cons:
- Some stabilizers can be difficult to install and remove
- Poorly lubricated stabilizers can cause more noise and rattle
- Stabilizers can add extra cost to the keyboard
- Some users may not notice a significant difference in typing experience with or without stabilizers
Overall, the pros of using keyboard stabilizers outweigh the cons. They provide a more stable and comfortable typing experience, reduce noise and wear on the keyboard, and can even help prevent repetitive strain injuries. While some types of stabilizers can be difficult to install, the benefits they provide make them a worthwhile addition to any mechanical keyboard.
Are Stabilizers Necessary for Mechanical Keyboards?
Stabilizers are necessary for mechanical keyboards as they provide a stable and comfortable typing experience. They are an important component of any mechanical keyboard and are particularly important for bigger keys, preventing them from wobbling.
On an ANSI or American keyboard, stabilizers are mandatory for shift keys, space bar, backspace, and enter keys.
FAQs
How many stabilizers should a keyboard have?
Does using a stabilizer make a difference?
Is upgrading stabilizers worth it?
Conclusion With Key Takeaways
Let’s conclude the post on Keyboard Stabilizer!
Now, here are the Key takeaways:
- Keyboard stabilizers are essential for mechanical keyboards, especially for larger keys like the spacebar and shift keys, to prevent wobbling and rattling sounds.
- There are three types of stabilizer mounting styles: plate-mounted, screw-in, and snap-in. Cherry-style stabilizers are popular for their flexibility, while Costar stabilizers provide better stabilizing performance.
- Screw-in stabilizers are the most effective in eradicating rattling and vibrations and are commonly found in custom-made keyboards.
- Snap-in stabilizers are similar to screw-in stabilizers but not as smooth and stable.
- Modders can innovate to improve the aspects of plate-mounted stabilizers.
Here is more for you:
You can also check our mechanical keyboard articles here.
I hope you enjoyed reading this post!

I’m Anirban Saha, Founder & Editor of TechBullish. With a B.Tech in Electronics and Communication Engineering, and 5+ years of experience as a software developer, I have expertise in electronics, software development, gadgets, and computer peripherals. I love sharing my knowledge through informational articles, how-to guides, and troubleshooting tips for Peripherals, Smart TVs, Streaming Solutions, and more here. Check Anirban’s Crunchbase Profile here.