Have you ever wondered how to check your monitor refresh rate and change the refresh rate of your monitor?
The refresh rate determines the details of an image. Whether you are a Windows or a Mac user if you use a monitor and want to check and change the refresh rate you can do so very easily.
During gaming, we prefer going for a higher refresh rate to get the best experience and eliminate screen tearing. At other times, a medium to low refresh rate also works fine for most of our tasks.
In this post, I have covered ways you can do whether you have a Windows 7/8/10/11 or a Mac OS system. I have given a comprehensive guide here.

Let’s get started!
What is Refresh Rate in a monitor?
Refresh rate is a measurement of how many times a monitor will redraw the entire image on the screen within a second. Refresh rate is commonly measured in hertz (Hz).
The higher the refresh rate is, the less likely it is that you will see any tearing or stuttering that may occur.
If you are gaming, watching movies, or doing any type of work that involves videos, you may want to consider upgrading your refresh rate to at least 60Hz or more.
In most cases, gamers will want a monitor with a refresh rate above 120Hz.
However, for a normal computer monitor, a refresh rate of 60-75Hz is going to be fine, as long as it has a response time of under a millisecond.
How to check and change the refresh rate in Windows 7?
Although this is only recommended for CRT displays, you can still change the refresh rate on a laptop screen or whatever LCD display you might have. Here are the steps to do it:
- Begin by closing all the open windows and thus programs. The changes you are about to make are best implemented across all apps if those apps are restarted with the new refresh rate already implemented.
- Click on the start button, either on the keyboard or from the desktop. Search for Control Panel, and click on the results to open it.
- Once the Control Panel is open, proceed to Appearance and Personalization, and click the Adjust screen resolution button.
- Under Advanced Settings, click on the Monitor tab.
- A new drop-down window will appear in the monitor settings. Click on it to select Screen refresh rate.
- Click on one of the available refresh rate options and click Apply.
- When the changes have been saved (as you can see, the refresh rate you just selected), you will inform that Windows is now adjusting the refresh rate. Click OK.
- If the changes are compatible with your screen, a new screen appears with the adjusted settings, for which you should click Yes to accept the changes.
- Now close all open windows and restart the computer to apply changes.
How to check and change the screen refresh rate in Windows 8?
Here are the steps which you can use to change the refresh rate if you are using a Windows 8 PC or a laptop. You can follow the steps below:
- On the start screen, click on the search button and type Control Panel to open it.
- Go to Appearance and Personalization and click on Adjust screen resolution.
- On the window that opens up, click on Advanced Settings.
- A three-tab window opens up; select the Monitor tab.
- The current refresh rate will be displayed on the drop-down menu. You can click on it to see the available options and change the refresh rate you want.
- Once you select your desired refresh rate, click on Apply, and then Ok.
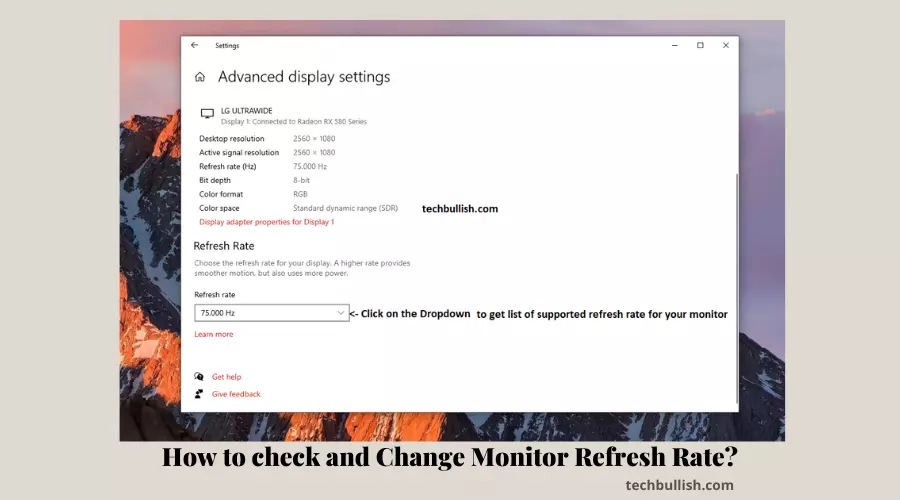
How to check and change the screen refresh rate in Windows 10?
Here are the steps below to change the refresh rate in your monitor if you use a Windows 10 System:
- Right-click on an empty area on the desktop.
- Select Display settings under the pop-up menu.
- The computer opens a settings window.
- On the right side, under the Multiple displays, click on Advanced display settings.
- Select the monitor whose refresh rate you want to change and then click on Display Adapter Properties.
- Click on the Monitor tab on the window that opens up.
- Select the refresh rate you want under the drop-down menu, and click Ok to confirm the changes.
How to check and change the screen refresh rate in Windows 11?
Here are the steps below to change the screen refresh rate in Windows 11, if you have already upgraded to it. You can follow the steps below:
- Launch Settings on your computer by pressing Win+I or from the Start menu.
- Click on System from the left sidebar and proceed to Display.
- Under Display, click on Advanced Display to open the refresh rate menu.
- Under the drop-down menu, you will see your current refresh rate. Click on the menu to select any rate available for your monitor. The changes should take effect immediately, but if prompted to save the changes, click Yes.
How to check refresh rate on monitor Mac
If you are a Mac user, then you can also check the refresh rate of your monitor. Here are the two different methods to check the refresh rate on Mac below:
Method 1 (Under System Information)
- Click on the Apple menu while holding down the OPTION key.
- Select System Information, and click on Graphics/Displays on the sidebar.
- Refresh rates for the available displays will be listed in the information window that opens up.
Method 2 (Under Display Preferences)
- Press the Apple key and go to System Preferences.
- Select Display.
- While holding down the Option key, click on Scaled to show the current monitor’s refresh rate.
How to Make your monitor Run at 120Hz or 144 Hz?
You may have seen the advertised refresh rate of 120 Hz or 144 Hz while purchasing your monitor, but you may have a limitation when trying to change the refresh rate in Windows.
It can be due to the following things:
1. Changing the Old HDMI cable
Your HDMI cable is old, and now it does not support transmission and a good quality HDMI cable. In that case, you need to change your cable, which would help you increase your monitor refresh rate.
2. Upgrading Low-Quality Graphics Card
The Refresh Rate may not support your older graphics card, and you have got a monitor upgrade.
In that case, you need to check how much your GPU can render FPS and if it goes with your monitor’s higher refresh rate.
3. Updating the Graphics Driver
We need to get our graphics card to send frames at a higher rate. If you have a newer card, this is probably already set up.
But if you have an older card or integrated graphics, you’ll have to update the drivers or BIOS to enable higher refresh rates.
Is it safe to overclock the 60Hz monitor to 75Hz?
Yes, it is safe to overclock a monitor. When you overclock a monitor, your monitor will display more frames per second, making the image smoother.
If you overclock your monitor to 75Hz, you need to make sure your monitor supports 75Hz so that it will work.
If your monitor does not support 75Hz overclock, your monitor will not work.
In case your monitor does not support 75Hz, it will revert to the default 60Hz refresh rate. So, you can try out to overclock your monitor.
How do I test my refresh rate?
You might want to know how much Hz is your monitor. You can test online using the following websites to know the refresh rate of your monitor quickly.
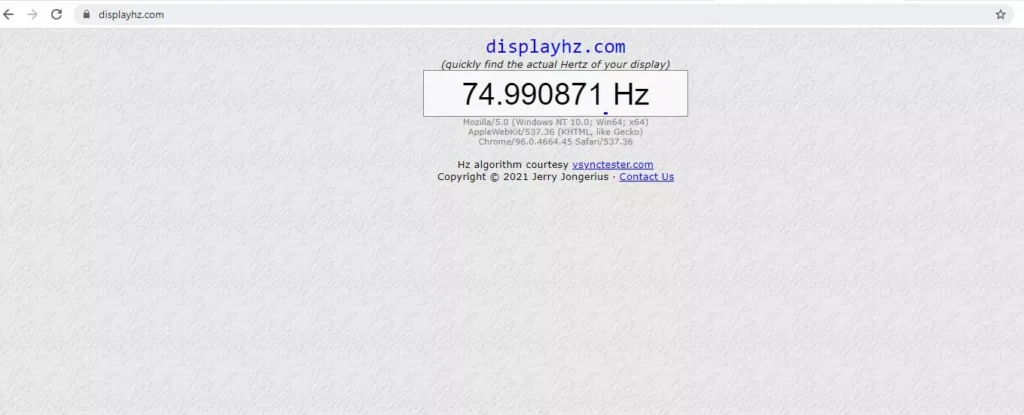
1. DisplayHz
If you want to check your refresh rate on your monitor, you can find that on the DisplayHZ website.
There you will be able to find the refresh rate of any monitor in a very easy way. Now, wait for a few seconds and get to know the monitor’s refresh rate.

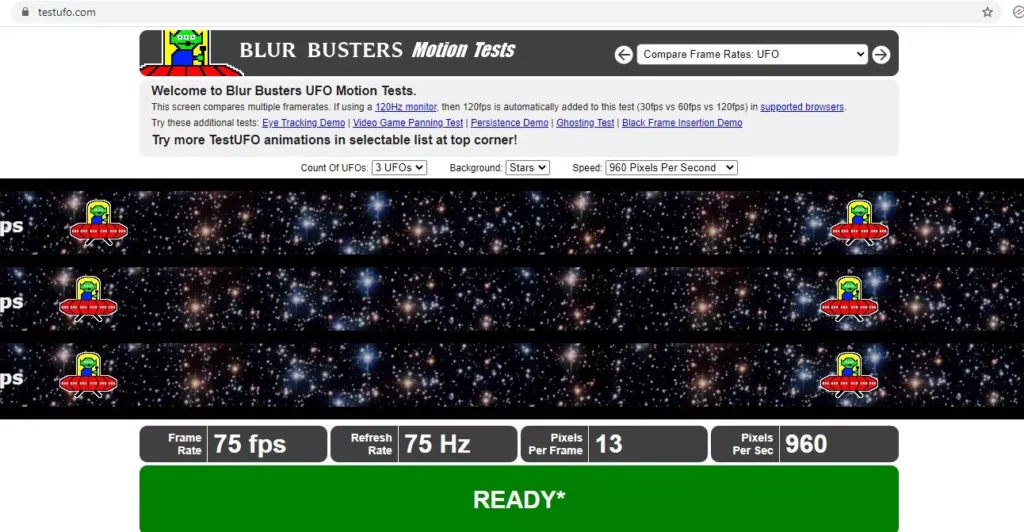
2. TestUFO
This is another handy site, and only you need to open this website and wait for a few seconds.
After you open TestUFO, you will see it takes a few seconds and then shows your monitor’s refresh rate.

All three websites here showed accurate Refresh rates for my monitor and performed quickly.
So, you can also easily check these websites and use them as a guide to know the current refresh rate of your monitor.
Conclusion
Let’s conclude the post on how to check the monitor refresh rate and also how to change it.
Now, you will quickly check your monitor’s Hz whether you are a Windows or a Mac User.
Also, I included several websites that show you the exact refresh rate for your monitor.
I hope you enjoyed reading this post.

I’m Anirban Saha, Founder & Editor of TechBullish. With a B.Tech in Electronics and Communication Engineering, and 6+ years of experience as a software developer, I have expertise in electronics, software development, gadgets, and computer peripherals. I love sharing my knowledge through informational articles, how-to guides, and troubleshooting tips for Peripherals, Smart TVs, Streaming Solutions, and more here. Check Anirban’s Crunchbase Profile here.
